Uploading Images to Aws S3 Node Js
How to Upload Files to Amazon S3 using Node.js
In this article, nosotros will understand how nosotros tin push files to AWS S3 using Node.js and Express.
Pre-requisites:
- An AWS account.
- Basic Express setup which will upload files in the backend using Multer. If yous desire to learn about basic file upload in Node.js, you tin can read this.
This commodity will exist divided into two parts:
1. Creating AWS S3 Bucket and giving it proper permissions.
two. Using JavaScript to upload and read files from AWS S3.
1. Creating AWS S3 Bucket and giving it proper permissions
a. Creating the S3 bucket
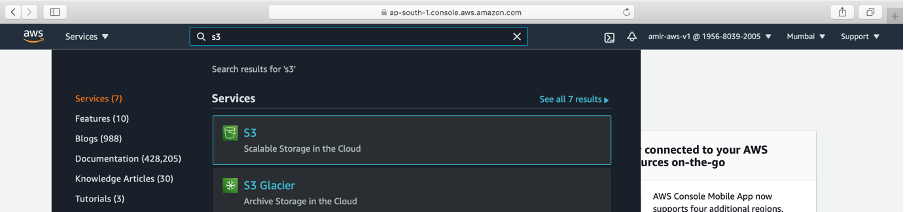
→ Log in to the AWS console and search for S3 service
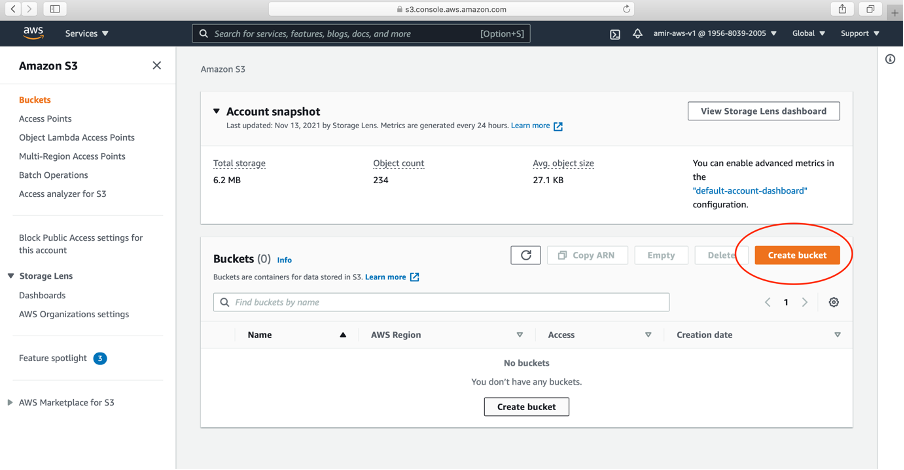
→ Create a bucket. Click Create bucket.
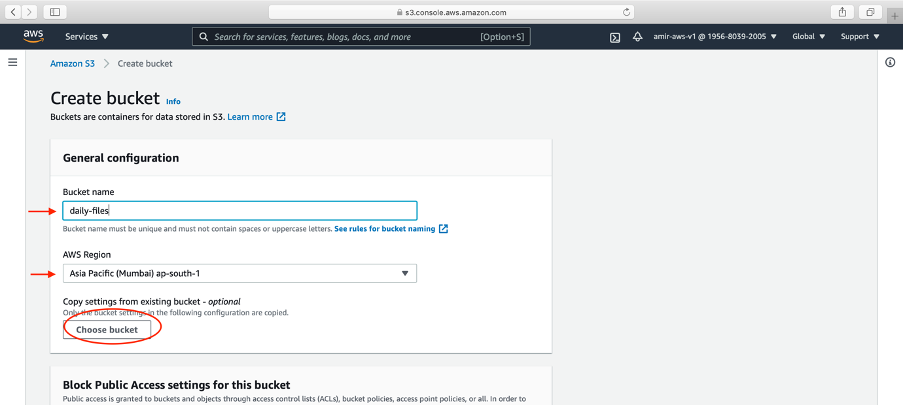
→ Write your bucket proper noun and AWS region. Click Create bucket push

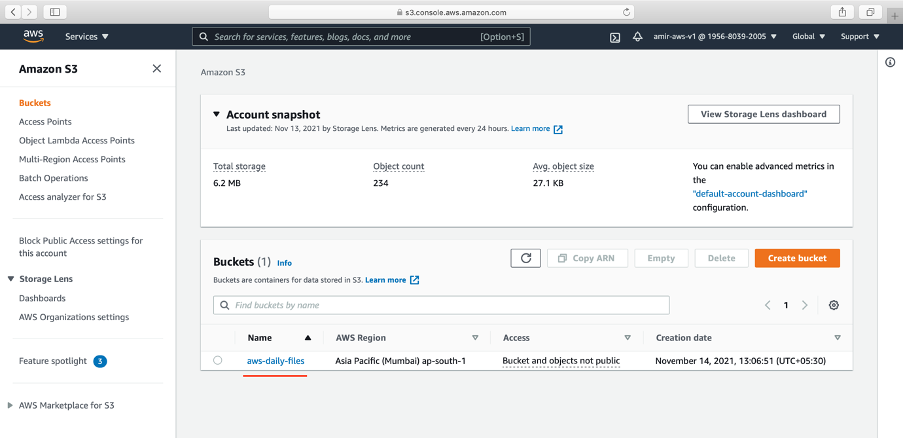
→ The bucket is successfully created. We will upload file to this bucket using Node.js
→ In your Node.js application, we will demand saucepan proper name and regions.
→ As nosotros are the creator of this S3 saucepan, I tin read, write, delete and update from the AWS panel. If we want to do it from the Limited server. We need to requite some permissions using IAM policies.
b. Creating IAM Policy:
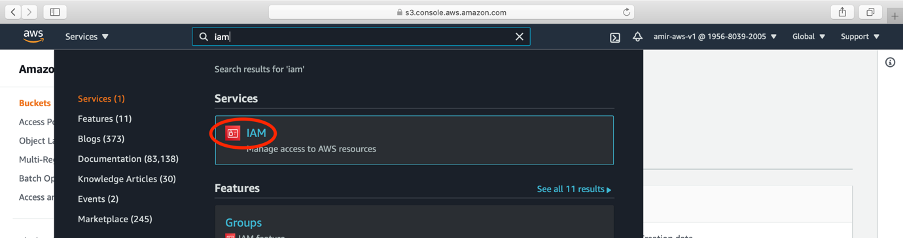
→ Go to the IAM service in AWS
→ Click Policies

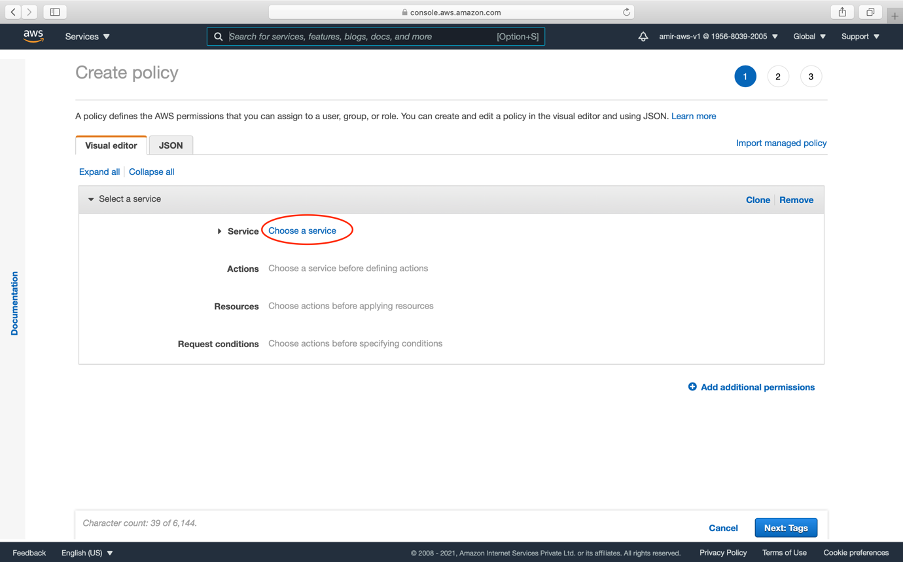
→ Click Create Policy push
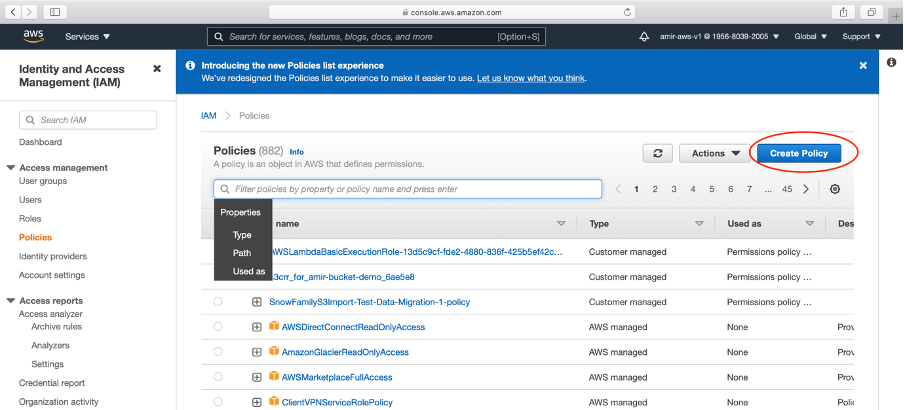
→ Nosotros will at present create our policy. This is specific to our newly created bucket.
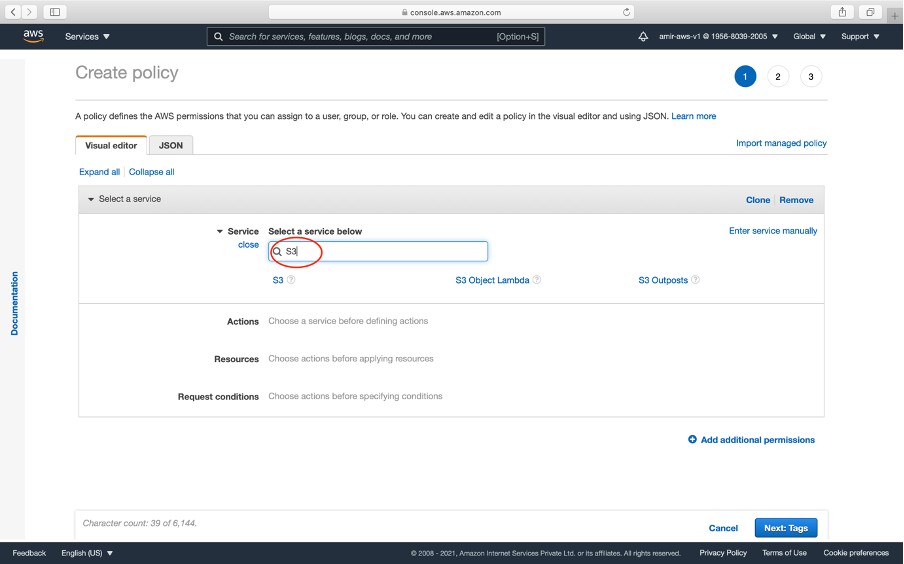
→ Click Chose a Service and select S3
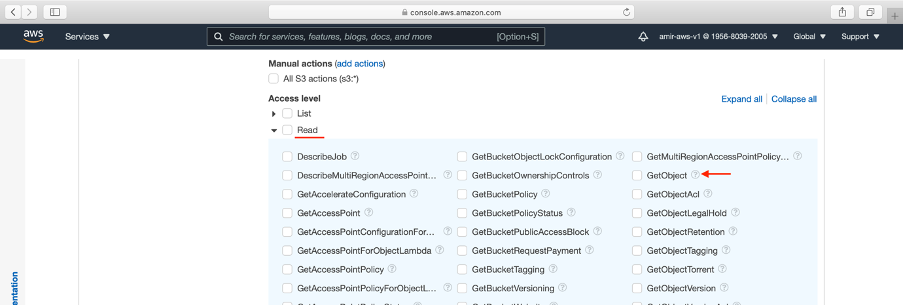
→ There are many S3 permissions we can give to the bucket. For uploading and reading beneath permissions will be sufficient
getObject — reading from S3
putObject — writing to S3
deleteObject — delete from S3
→ Click Write and select putObject and deleteObject
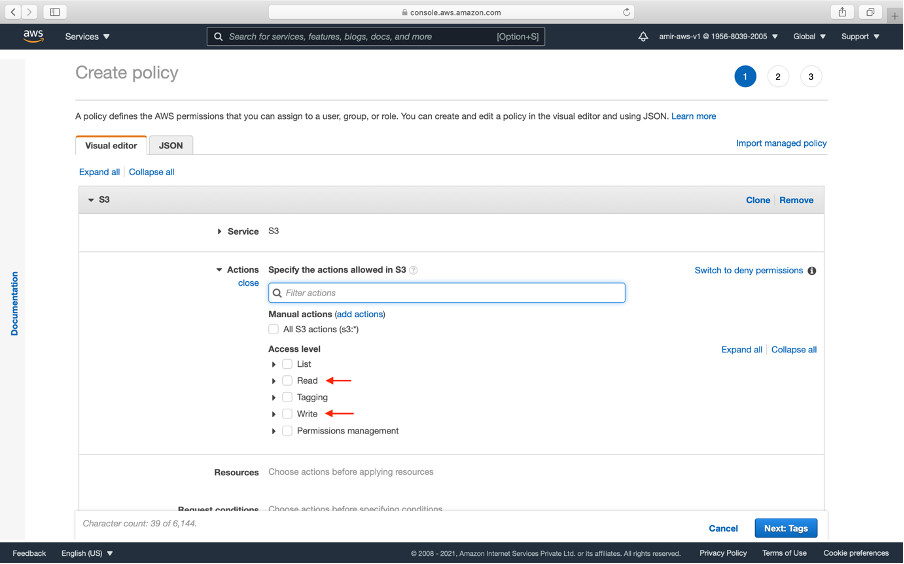
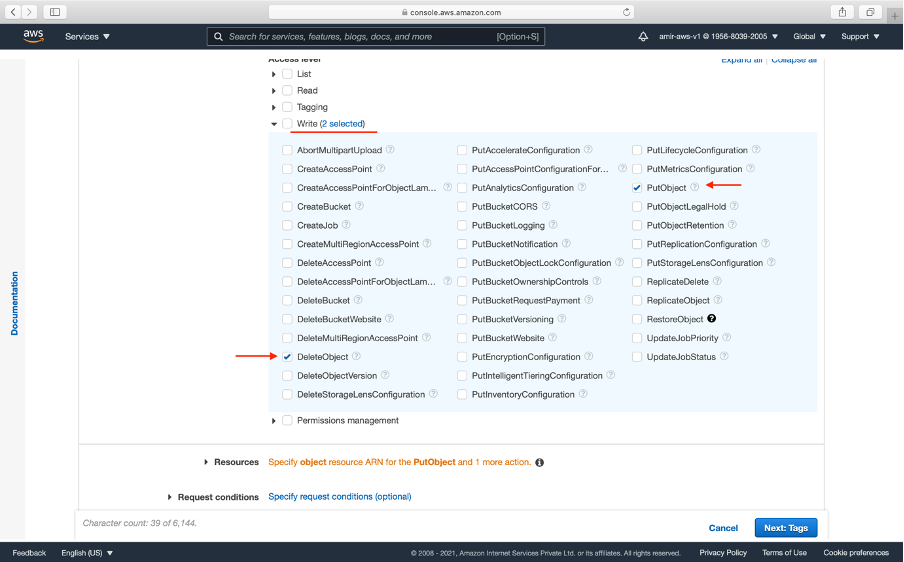
→ Click Read and select getObject
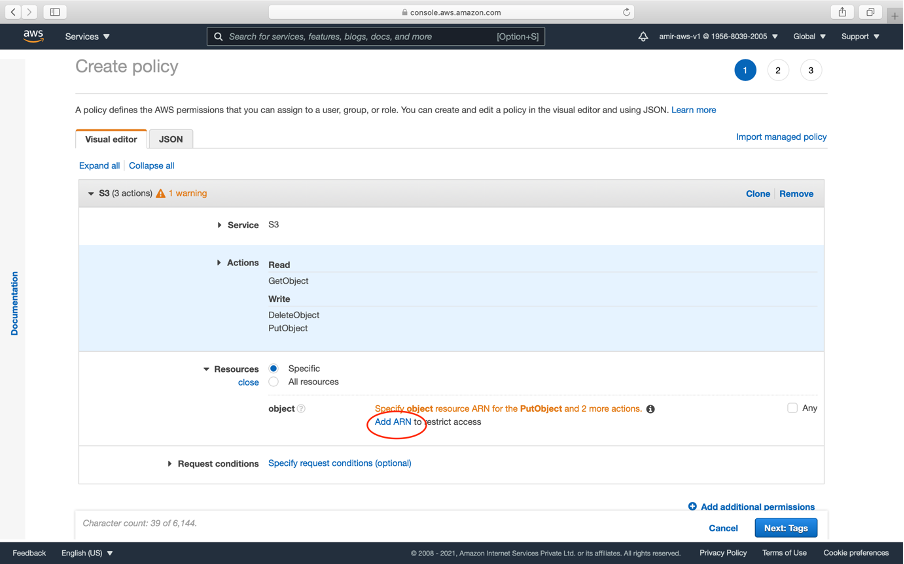
→ The next step is to add together ARN. ARN means y'all bucket identity
arn:aws::s3:::<your_bucket_name> // ARN SYNTAX eg. arn:was::s3::::aws-daily-sales
→ We are choosing a specific ARN because the rules will be applied to a specific S3 bucket.
→ Click add arn
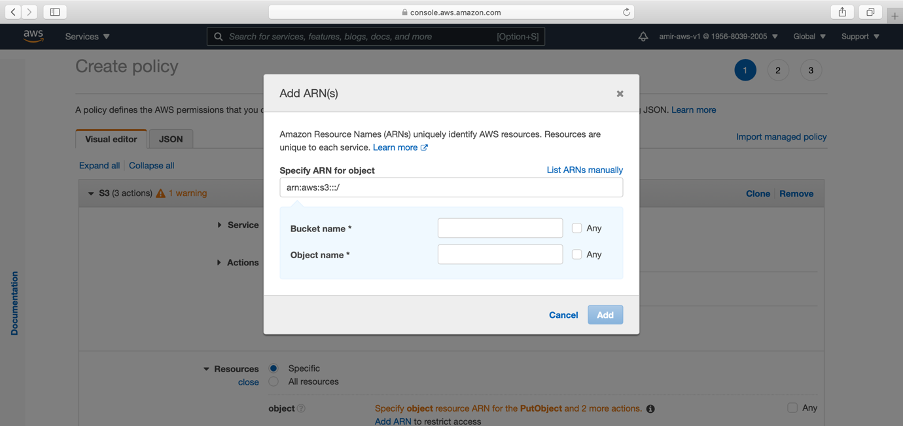
→ Paste your saucepan name and tick Any for Object name.

→ Nosotros now hot a couple of next buttons
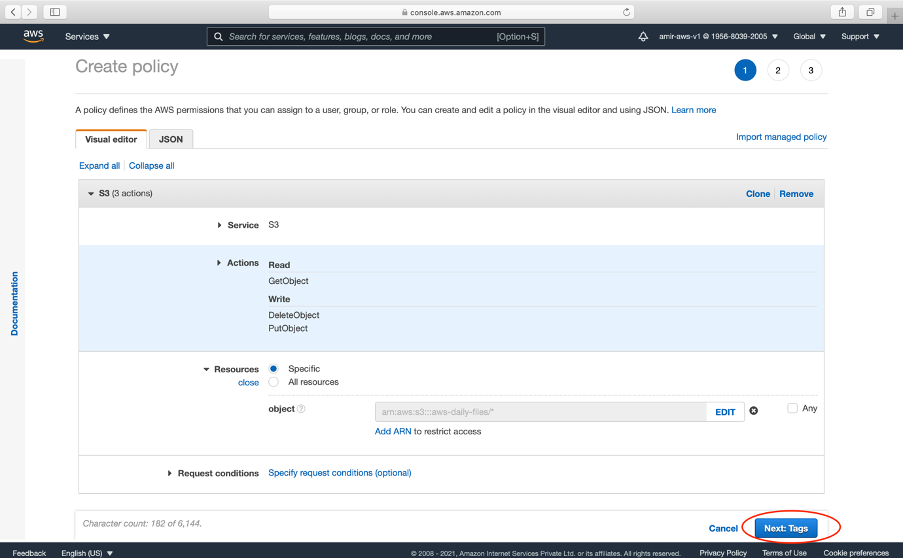
→ Click Create policy
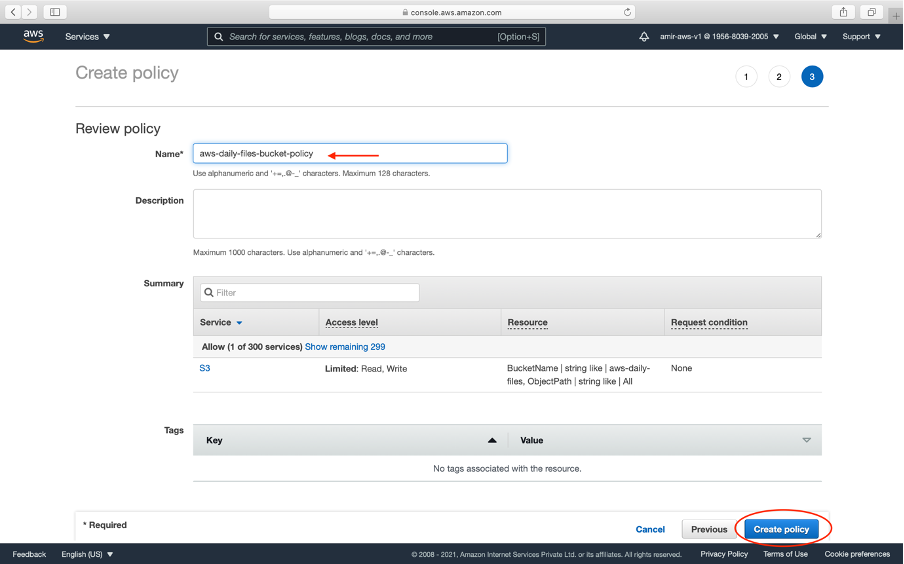
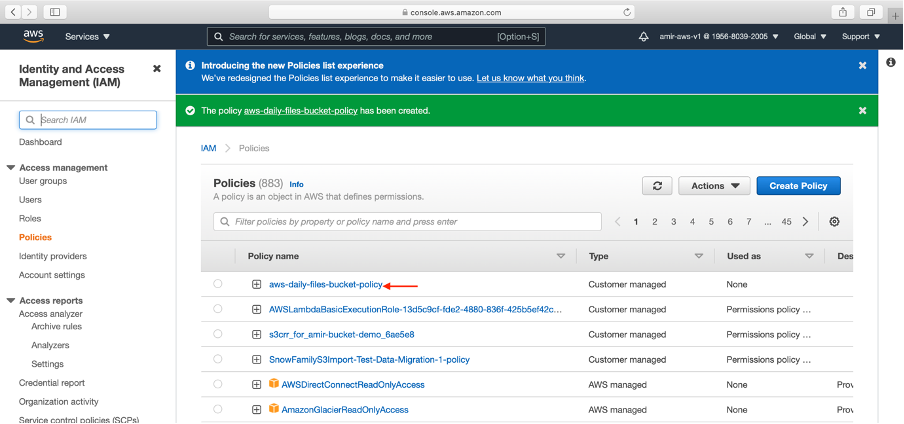
→ We now see our policy created. It has read, write and delete access.
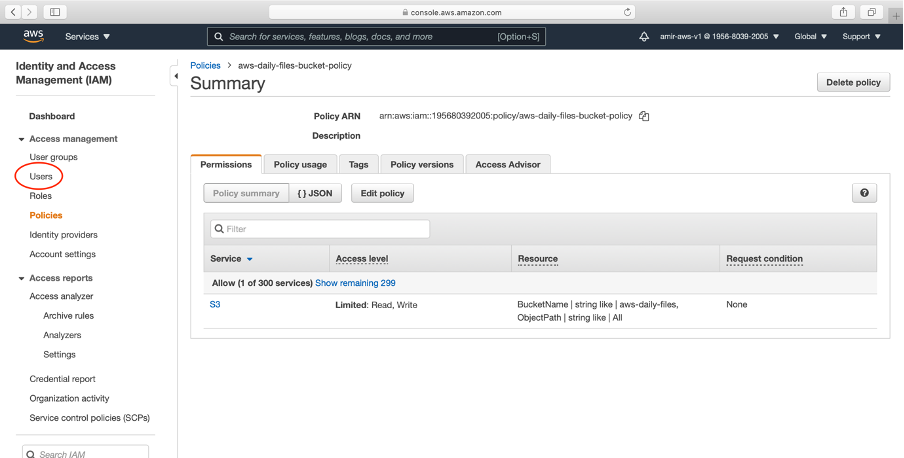
c. Create a IAM User:
→ This can be a physical user or a lawmaking which volition admission the S3 bucket.
→ Click Users from left explorer in IAM
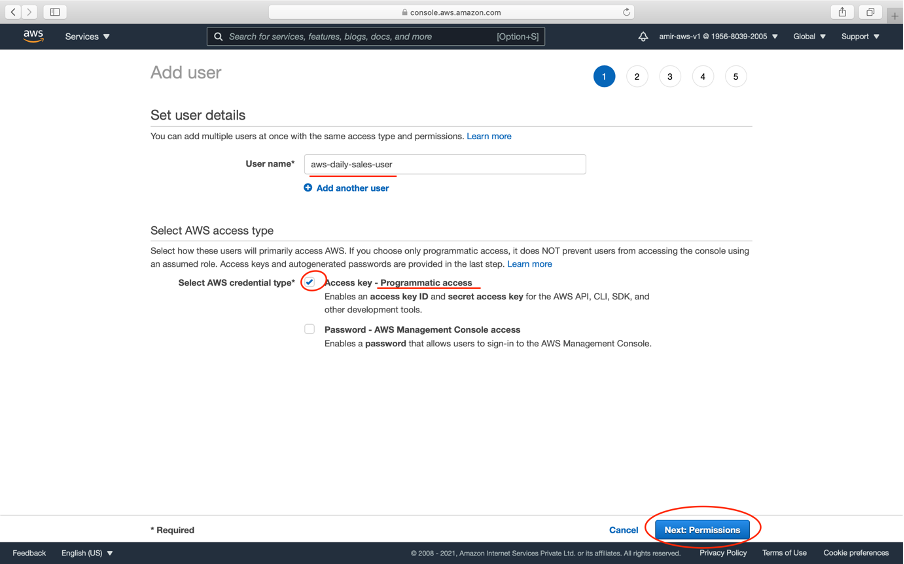
→ Click Add users
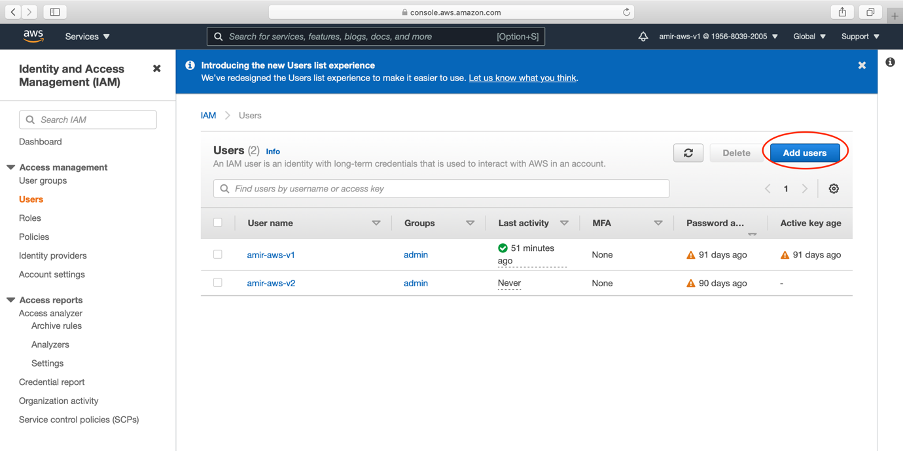
→ Write the proper name of the user. As our Express app will admission the S3.
Giving programmatic admission means a lawmaking/server is the user which will admission information technology. For our example Node.js app
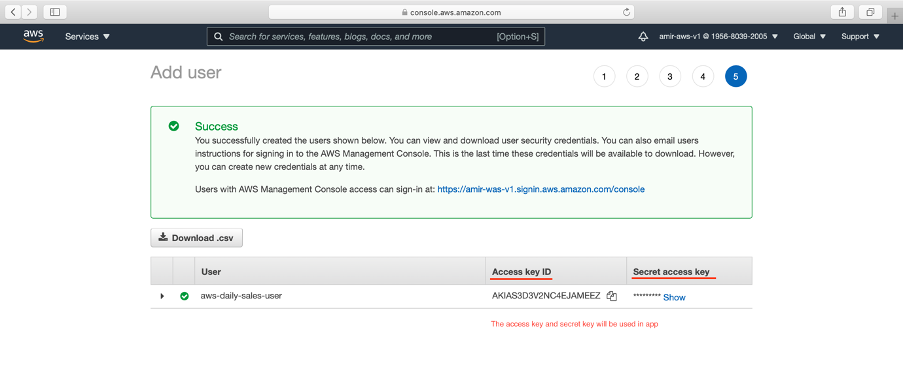
→ In the end, we volition get Access Primal Id and Secret fundamental to use in the JavaScript app as shown below:
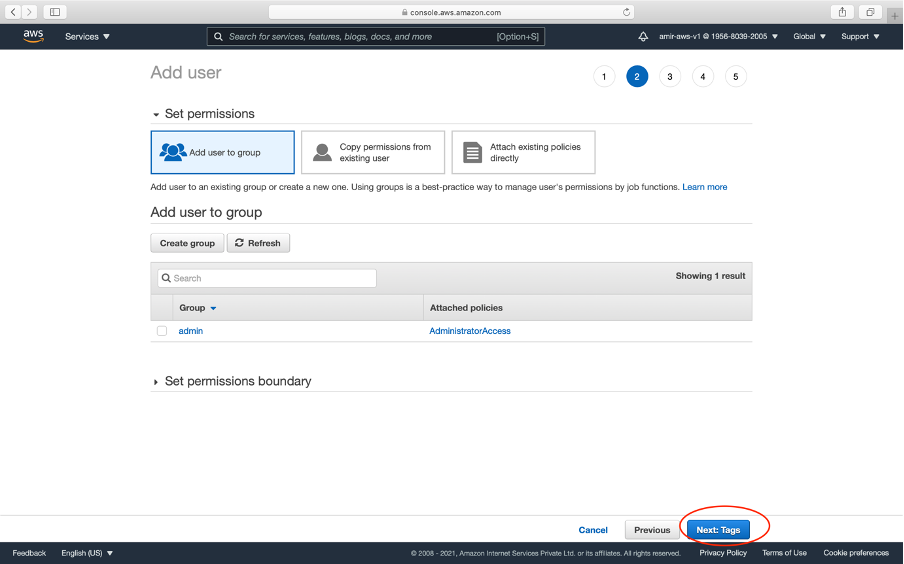
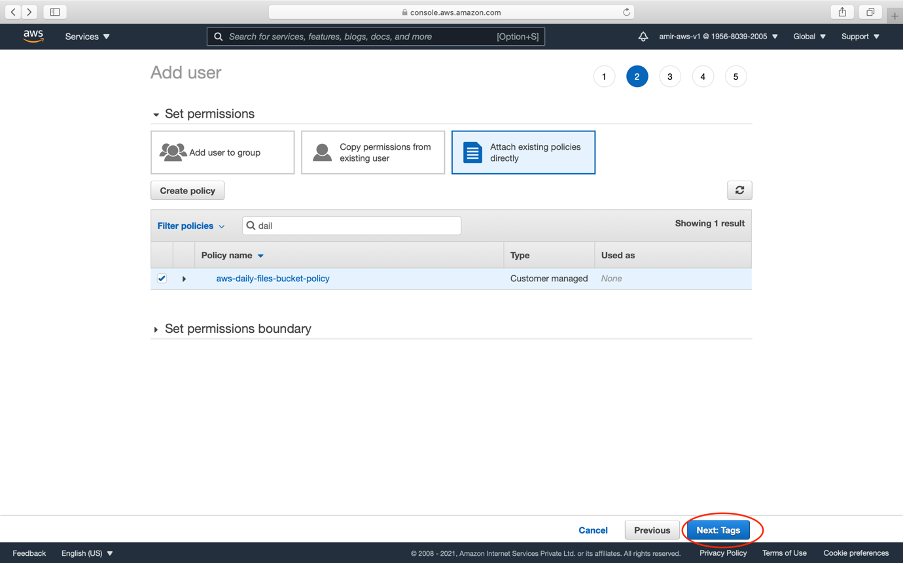
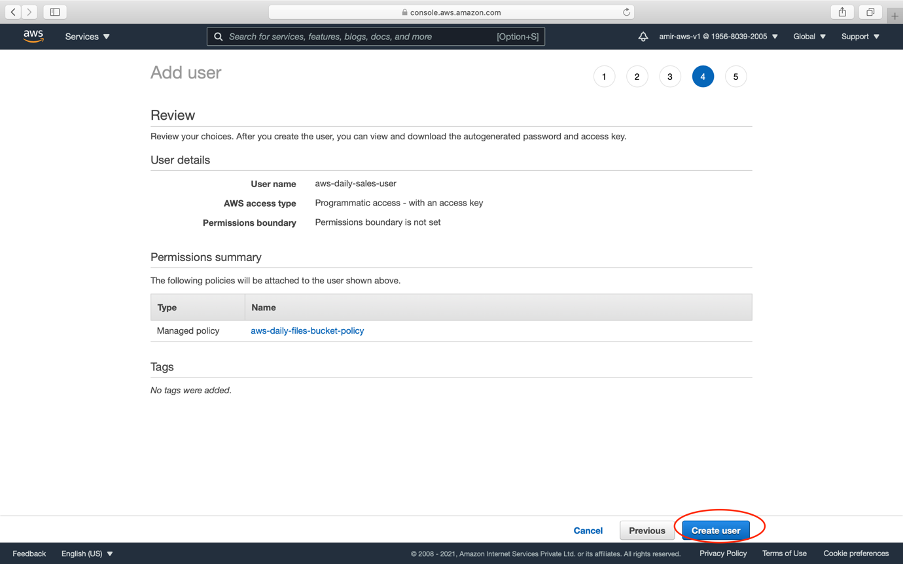
→ In the third tab, we attach our IAM policy created above. Nosotros at present click a couple of adjacent buttons

→ Click Create User push
→ We go Access Key Id and Hugger-mugger primal (Never share your undercover fundamental with anyone for security reasons)
→ Paste in your .env file of the application
→ The next step is to write some javascript code to write and read code to S3.
2. Using JavaScript to upload and read files from AWS S3
a. Recap of file uploading (using Multer):
→ Limited has two Postal service routes — single and multiple to upload unmarried and multiple images respectively using Multer.
→ image is saved in server/public/images.
→ A client app that calls the two road utilizing frontend
For the complete article, please read it here.
b. Integrating AWS with Express
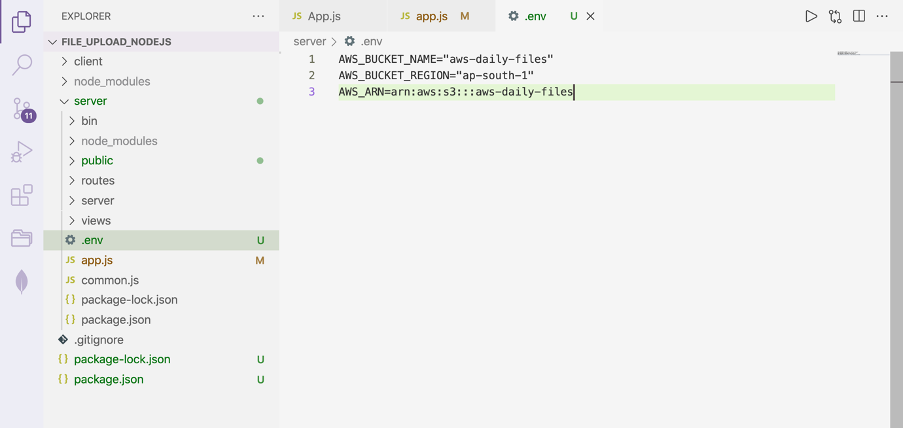
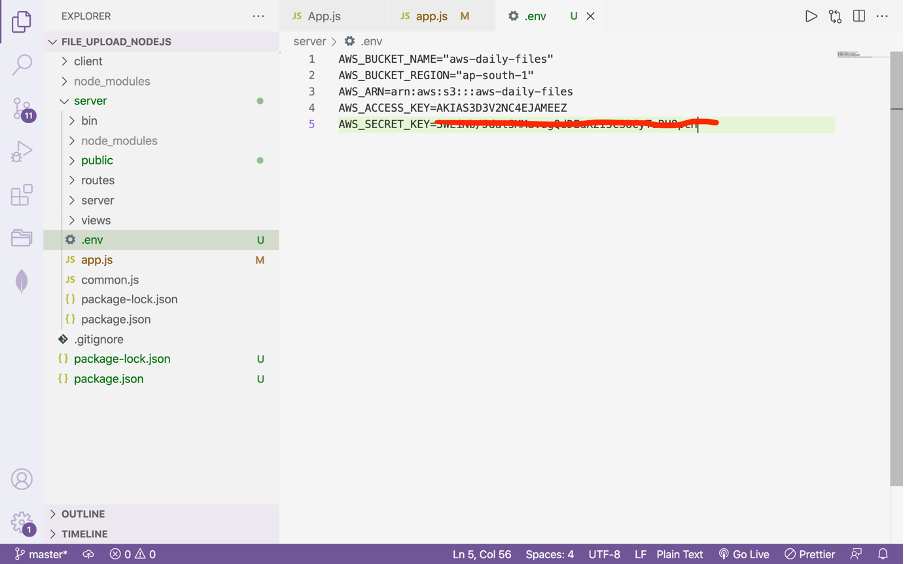
→ Create .env file and paste your AWS credentials
          AWS_BUCKET_NAME="aws-daily-files"
AWS_BUCKET_REGION="ap-south-one"
AWS_ARN=arn:aws:s3:::aws-daily-files
AWS_ACCESS_KEY=AKIAS3D3V2NC4EJAMEEZ
AWS_SECRET_KEY=3WE************************pcH
→ Install AWS SDK using the below command
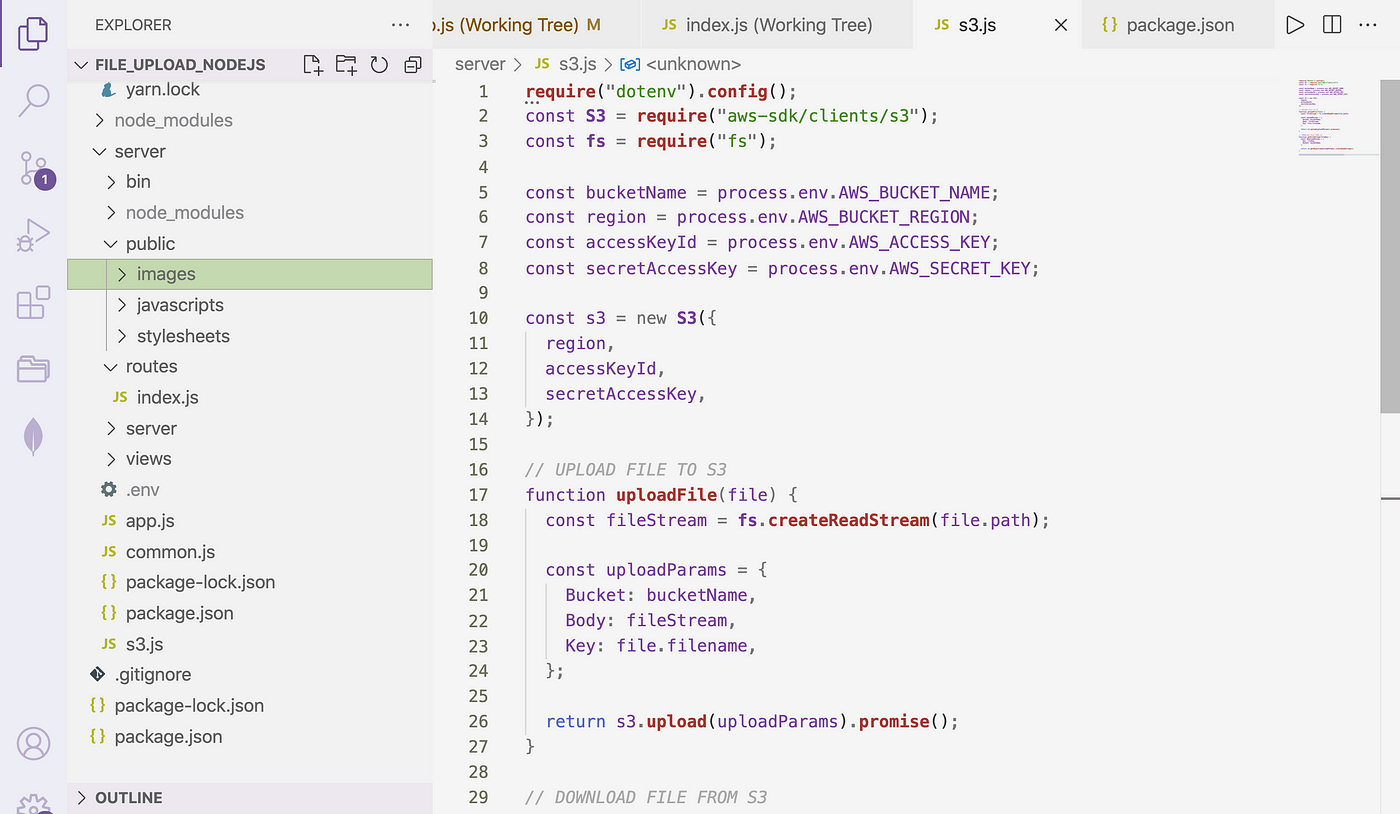
npm install aws-sdk dotenv → Create s3.js file in your application
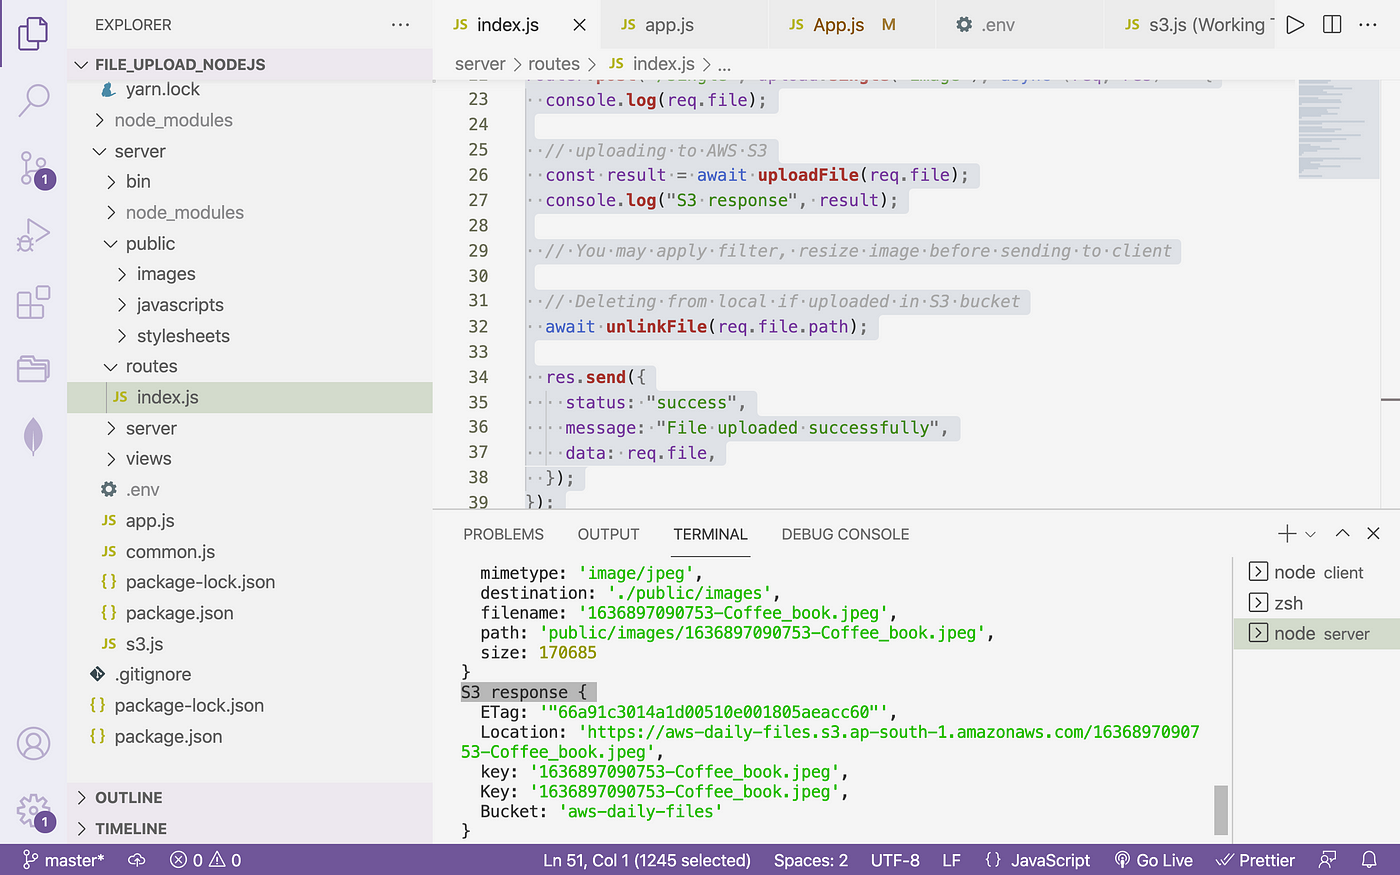
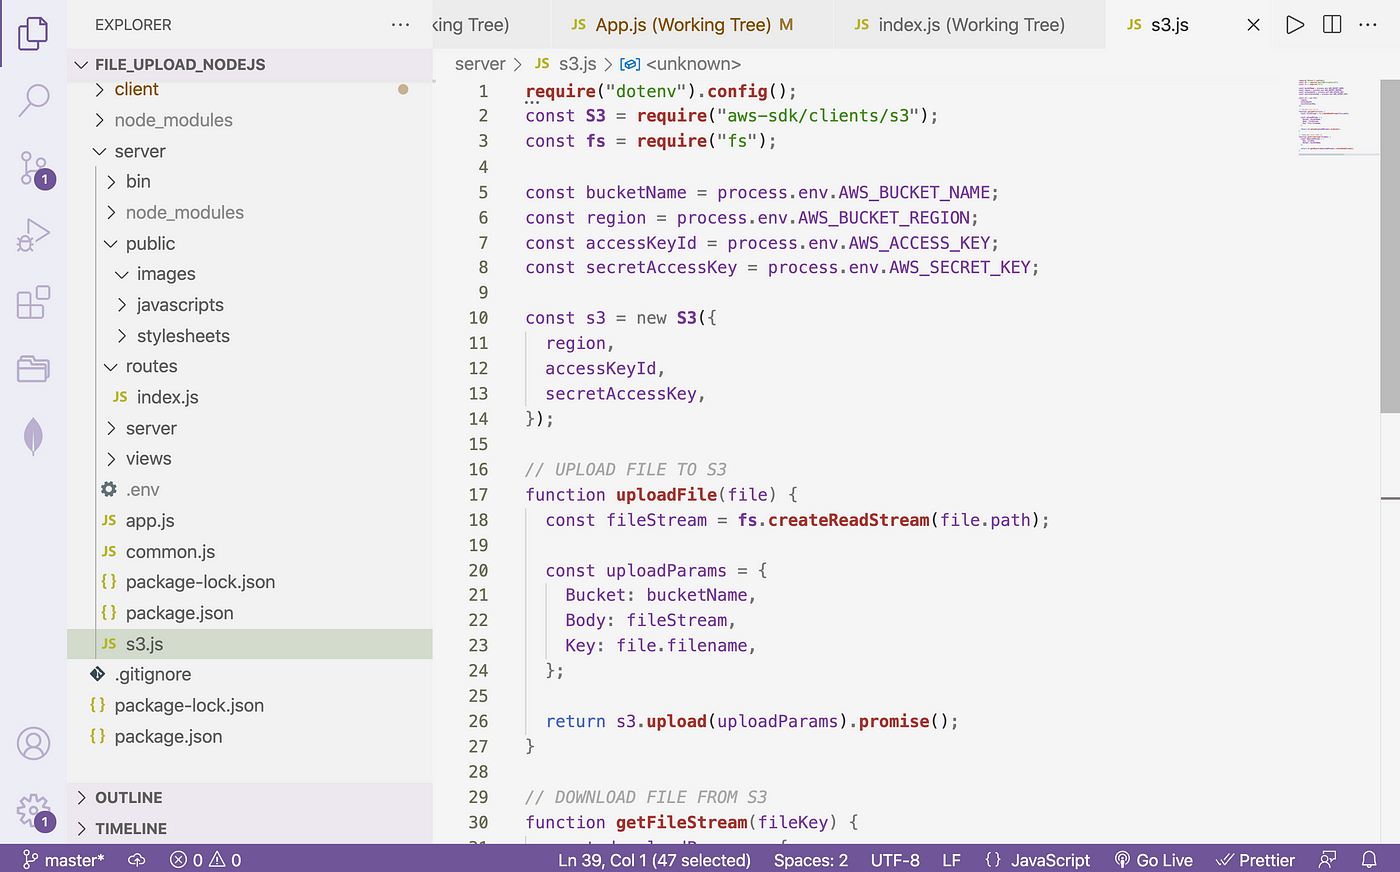
c. Writing to S3:
                      require("dotenv").config();          const            S3            =            require("aws-sdk/clients/s3");          const            fs            =            require("fs");          const bucketName = process.env.AWS_BUCKET_NAME;          const region = process.env.AWS_BUCKET_REGION;          const accessKeyId = process.env.AWS_ACCESS_KEY;          const secretAccessKey = procedure.env.AWS_SECRET_KEY;          const s3 = new            S3({                      region,                      accessKeyId,                      secretAccessKey,          });
                                // UPLOAD FILE TO S3                    function            uploadFile(file) {                      const fileStream =            fs.createReadStream(file.path);                      const uploadParams = {                      Bucket: bucketName,                      Body: fileStream,                      Key: file.filename,                      };          return s3.upload(uploadParams).promise(); // this will upload file to S3          }          module.exports = {            uploadFile            };
→ Now get to your routes file
server/router/alphabetize.js
          var            express            =            require("express");          var router =            limited.Router();          const upload =            require("../common");          const {            uploadFile            } =            require("../s3");          const            fs            =            crave("fs");          const            util            =            require("util");          const            unlinkFile            =            util.promisify(fs.unlink);
                    router.mail service("/single", upload.single("paradigm"), async (req, res) => {                      console.log(req.file);                                    // uploading to AWS S3                                const upshot = await            uploadFile(req.file);  // Calling higher up role in s3.js                      panel.log("S3 response", event);                                    // You may apply filter, resize image earlier sending to client                                              // Deleting from local if uploaded in S3 bucket                                await            unlinkFile(req.file.path);                      res.send({                      status: "success",                      message: "File uploaded successfully",                      data: req.file,                      });          });          module.exports = router;
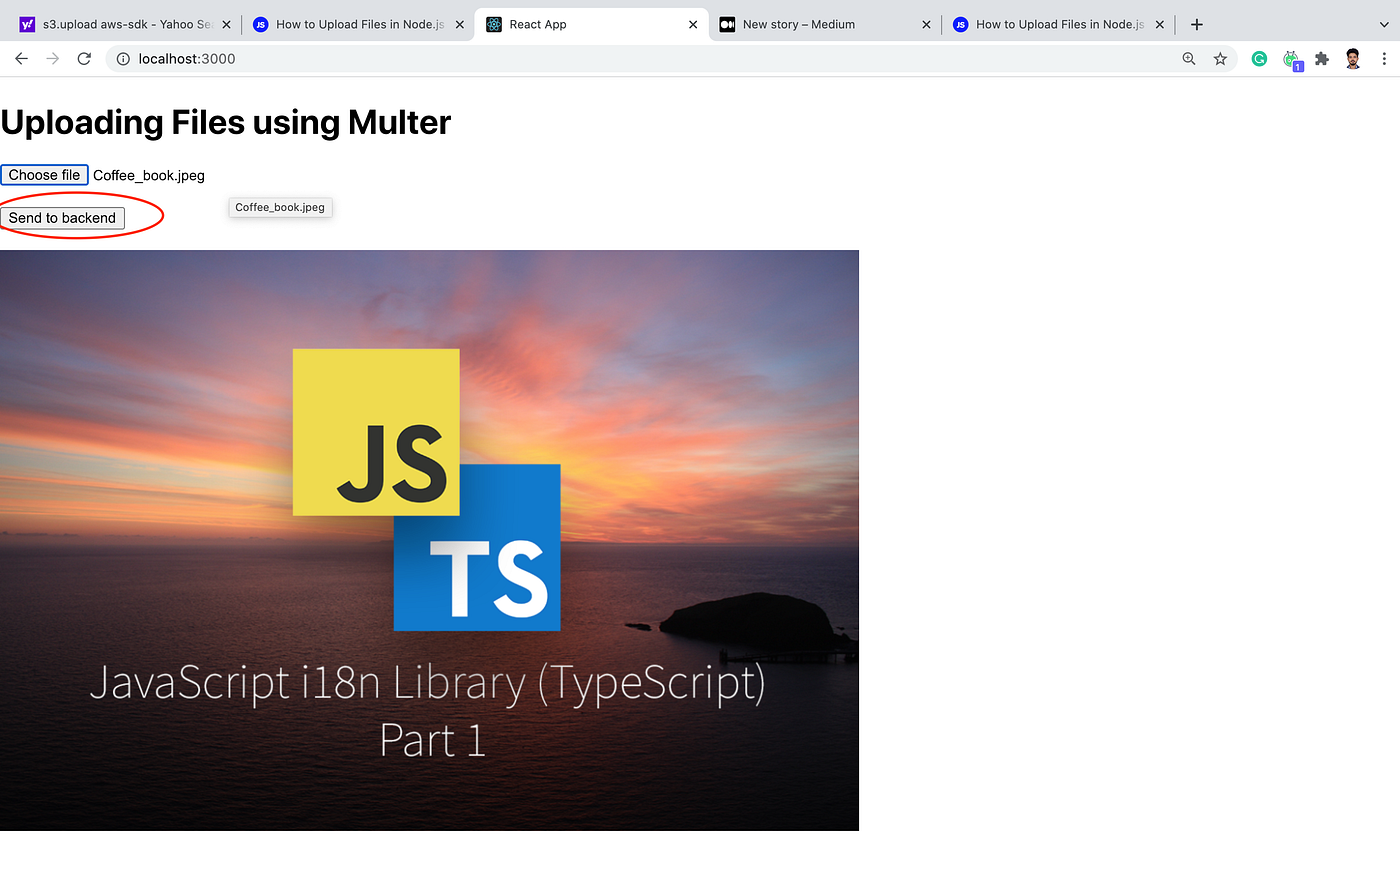
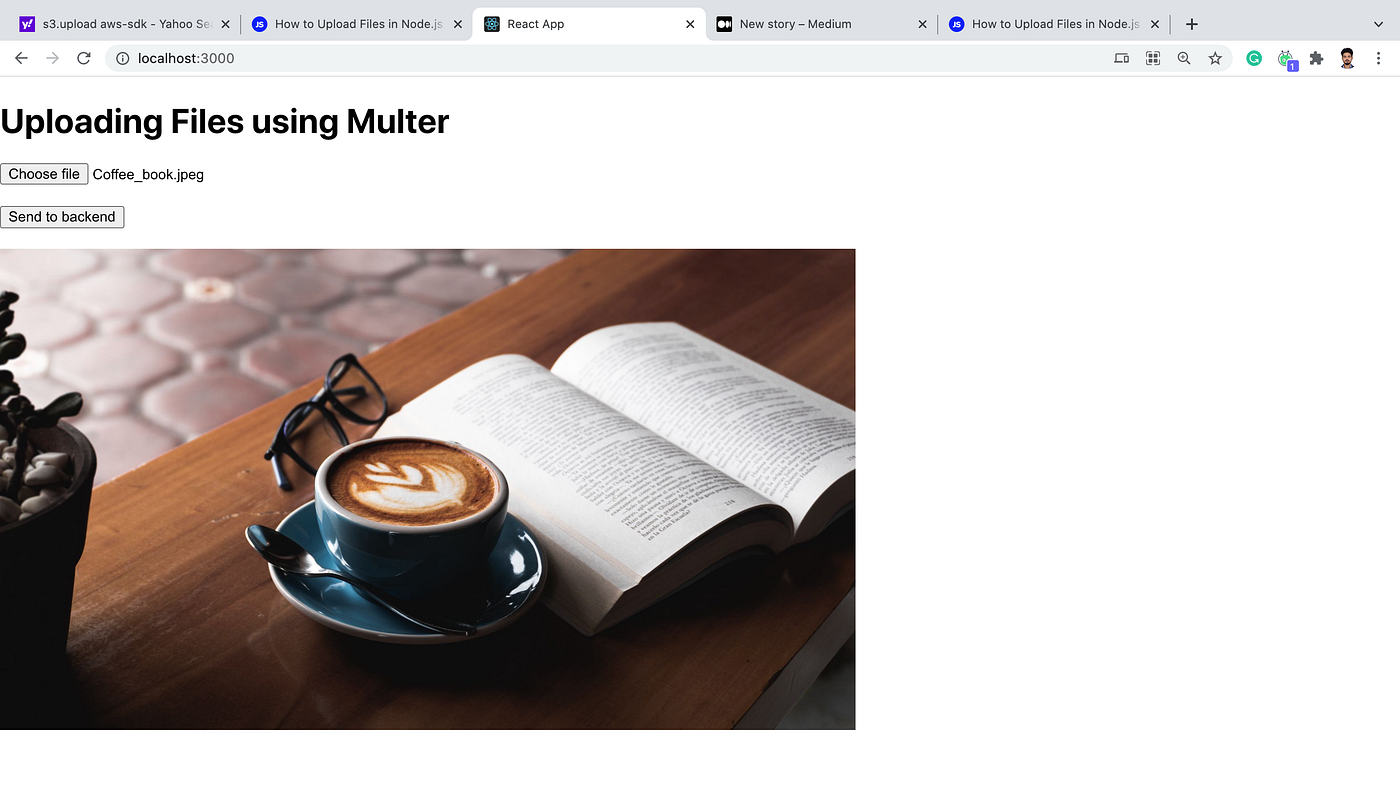
→ Nosotros take created a basic frontend that sends data to Express every bit POST multipart data

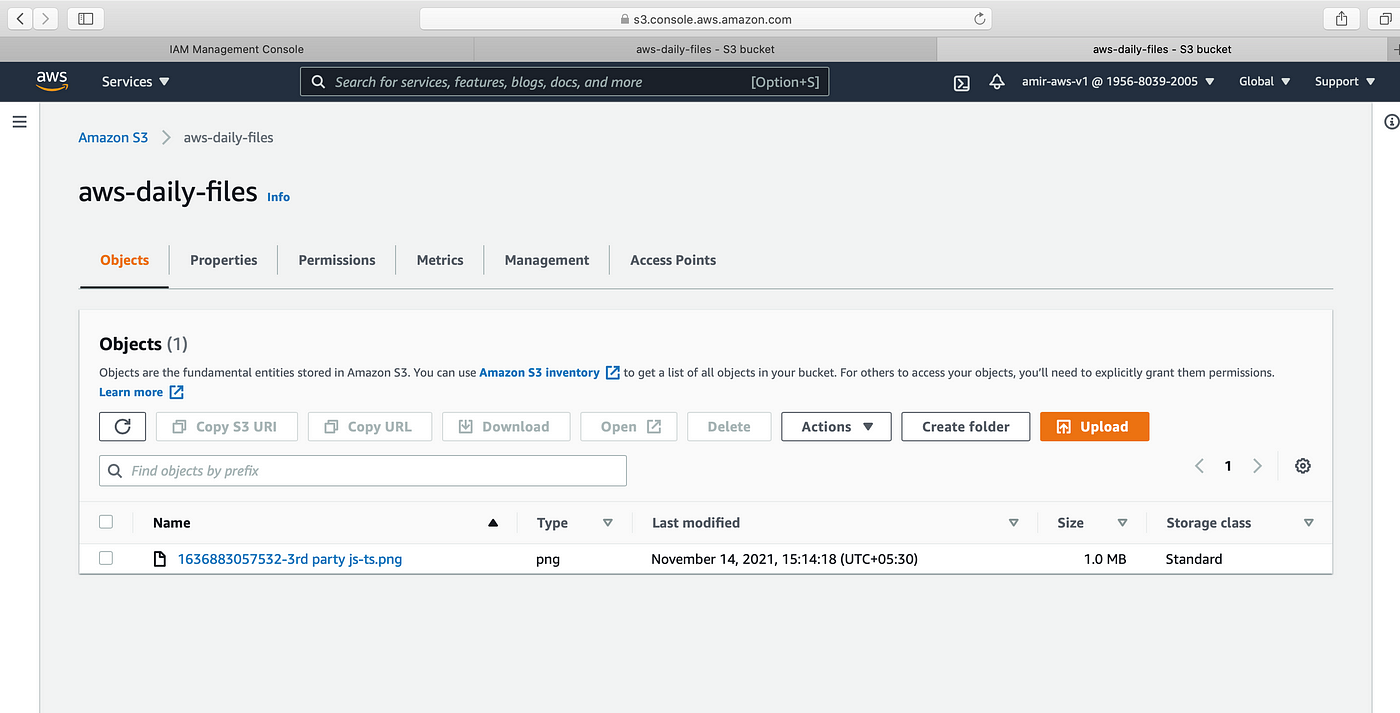
→ Reading information from S3 and printing in the client will exercise below. For now we will meet data volition be uploaded and is besides therein S3 saucepan in AWS console.
AWS console before uploading
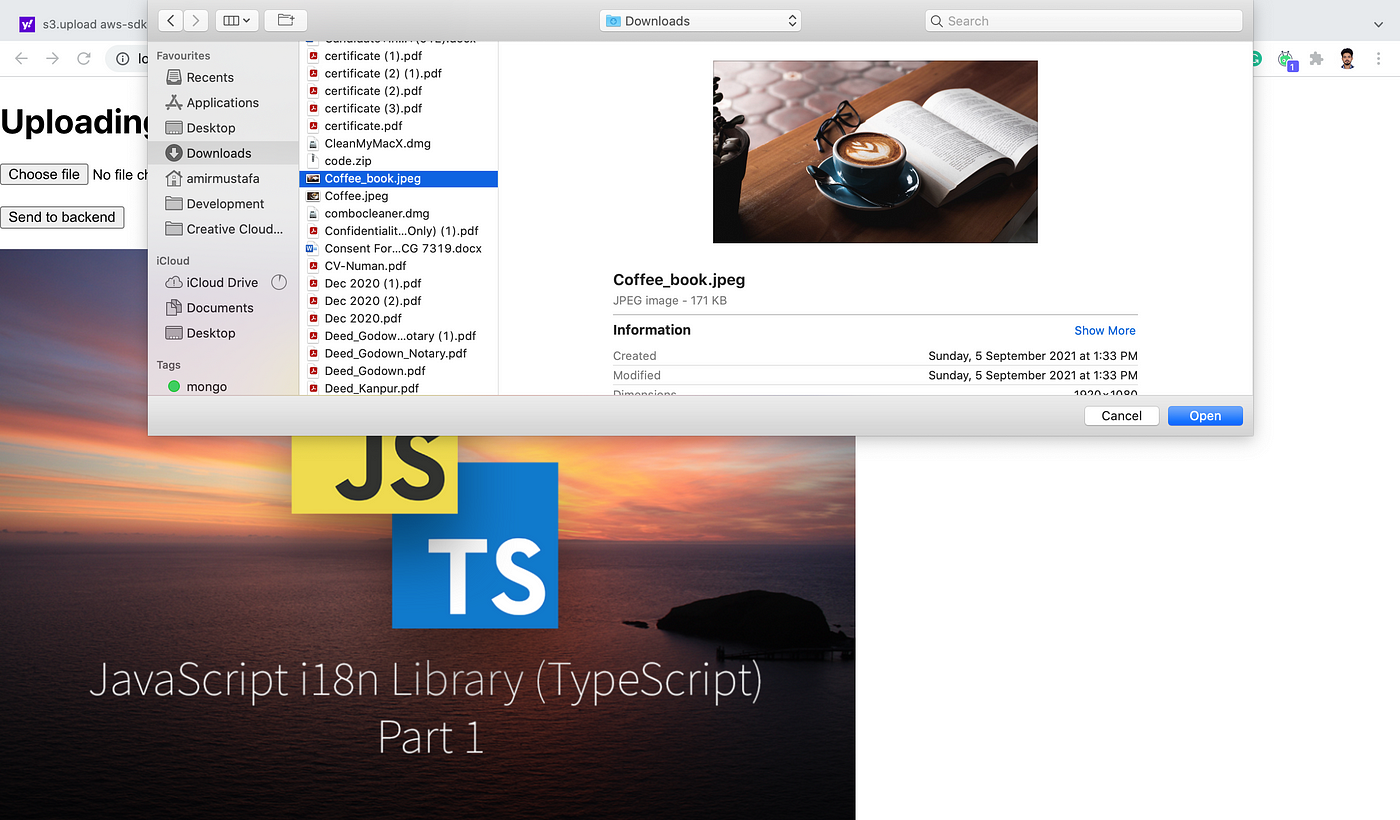
→ Click Send to backend push
→ In the Node.js server final, we encounter a response printed from S3. Hither the key is the file proper name and the path is the location to file.
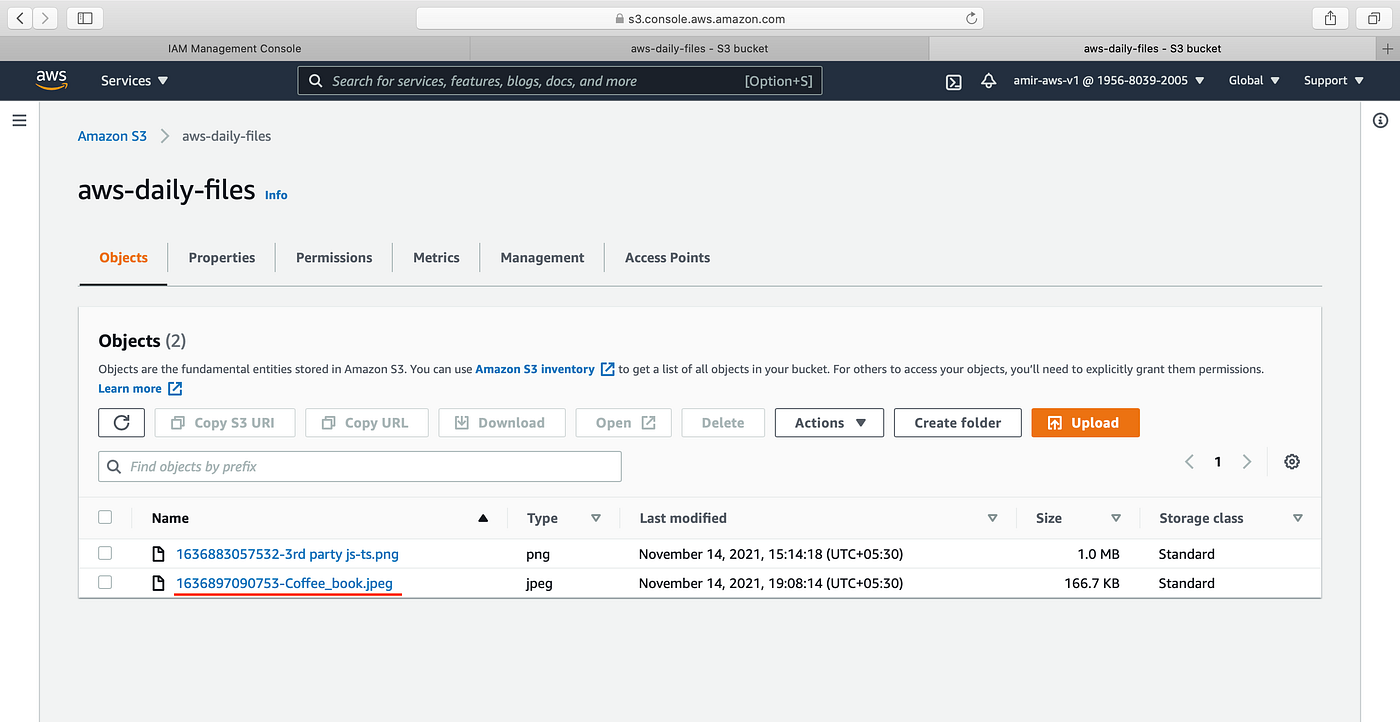
→ Let u.s.a. check the S3. We meet a new file is uploaded in S3
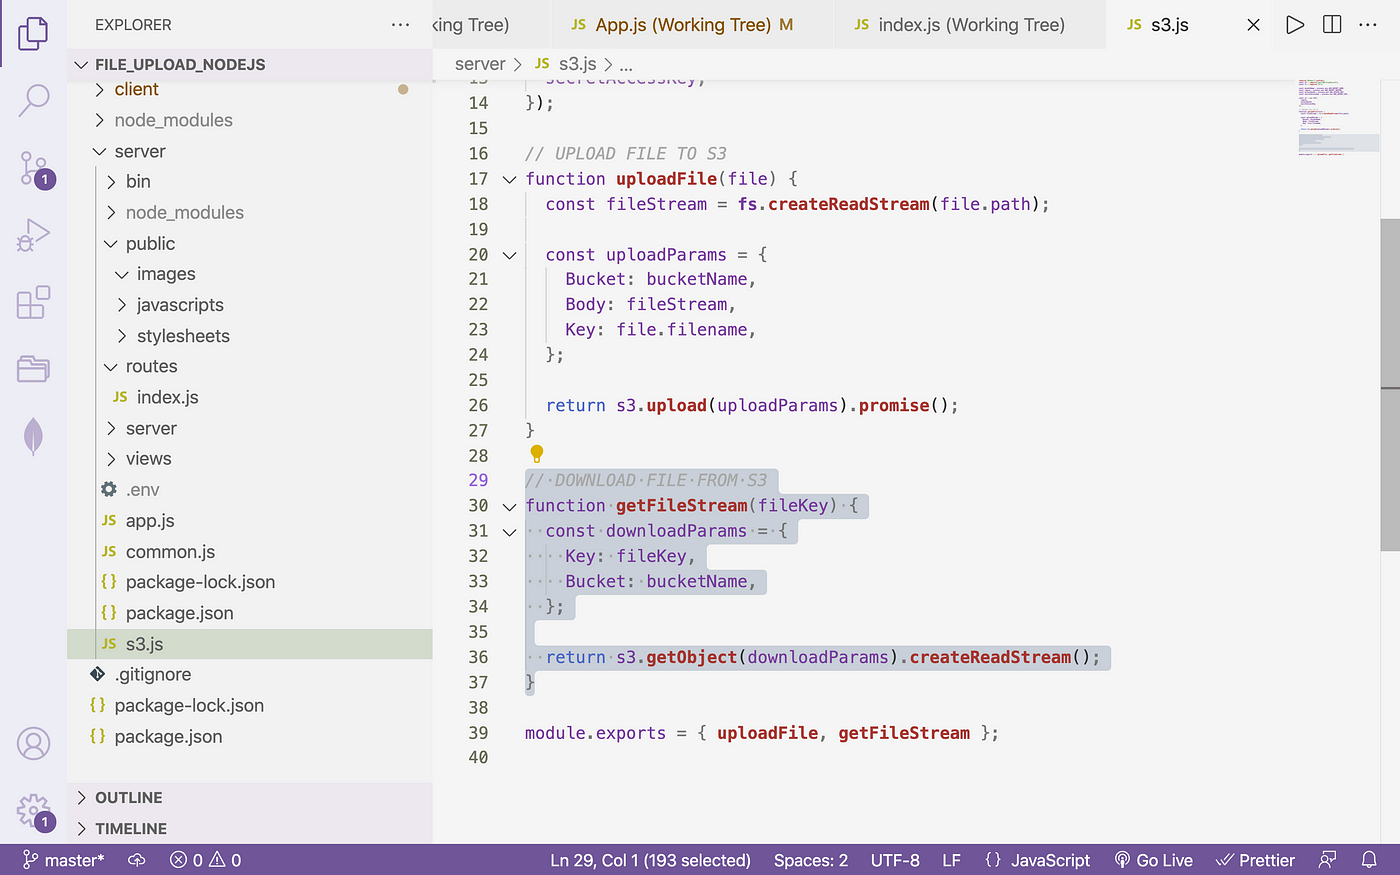
d. Reading file from S3:
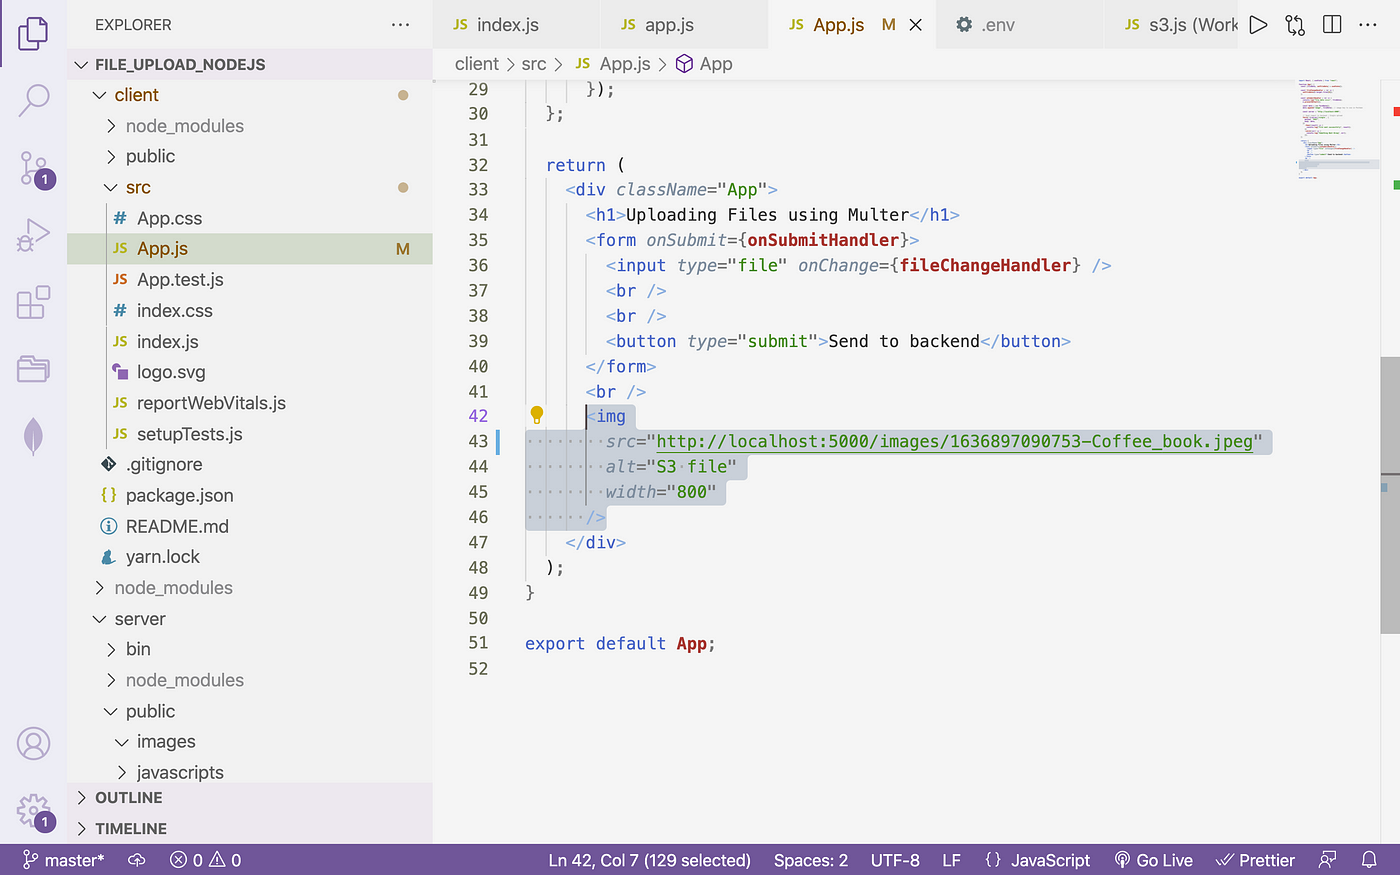
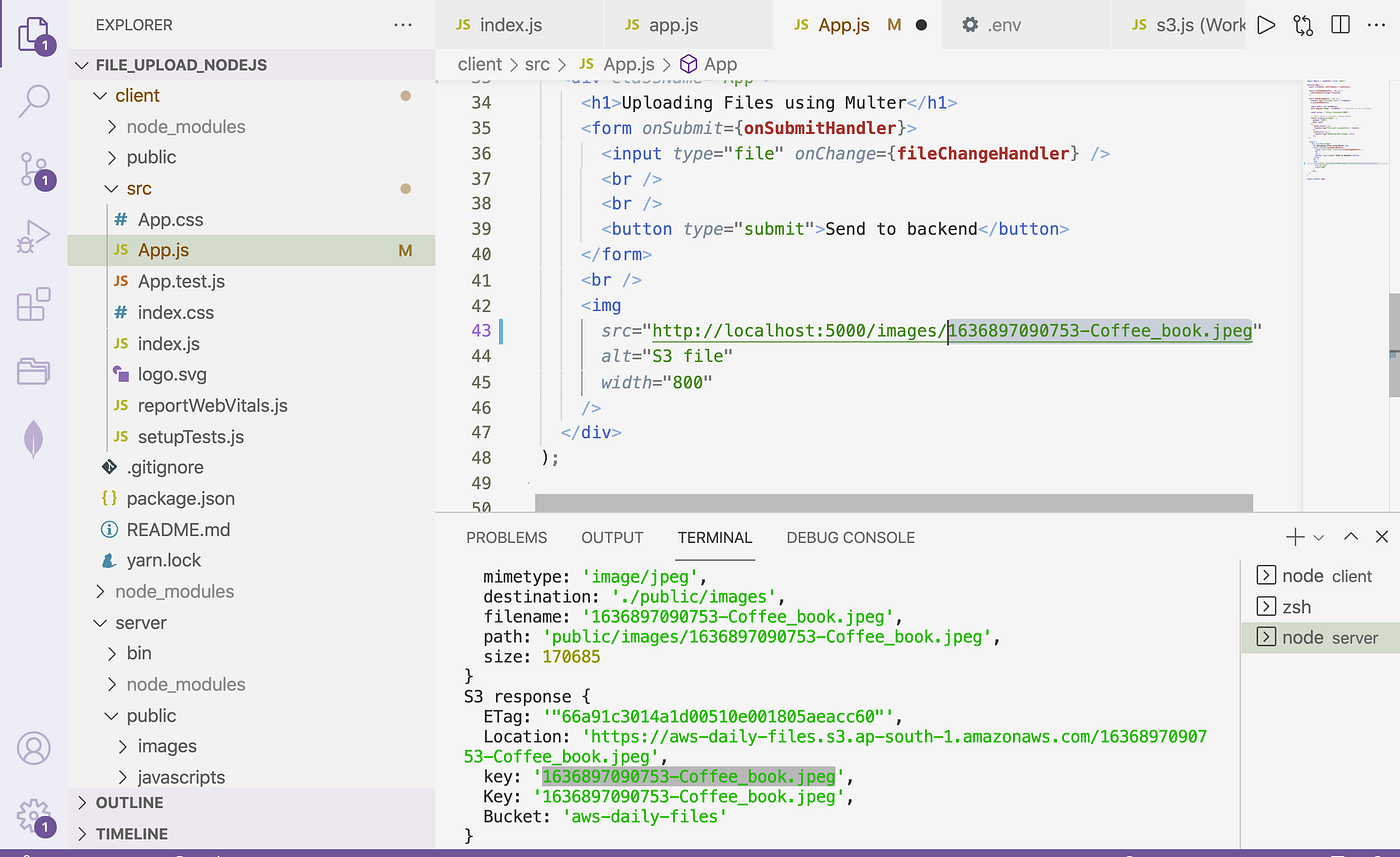
→ Nosotros see from the above epitome new image is reflecting client-side from S3. Allow us write the code for it.
server/s3.js
                      require("dotenv").config();          const            S3            =            crave("aws-sdk/clients/s3");          const            fs            =            crave("fs");          const bucketName = process.env.AWS_BUCKET_NAME;          const region = process.env.AWS_BUCKET_REGION;          const accessKeyId = process.env.AWS_ACCESS_KEY;          const secretAccessKey = process.env.AWS_SECRET_KEY;          const s3 = new            S3({
            region,
            accessKeyId,
            secretAccessKey,
});                      // DOWNLOAD FILE FROM S3                    role            getFileStream(fileKey) {                      const downloadParams = {                      Key: fileKey,                      Bucket: bucketName,          };          return s3.getObject(downloadParams).createReadStream();          }          module.exports = {            uploadFile,            getFileStream            };
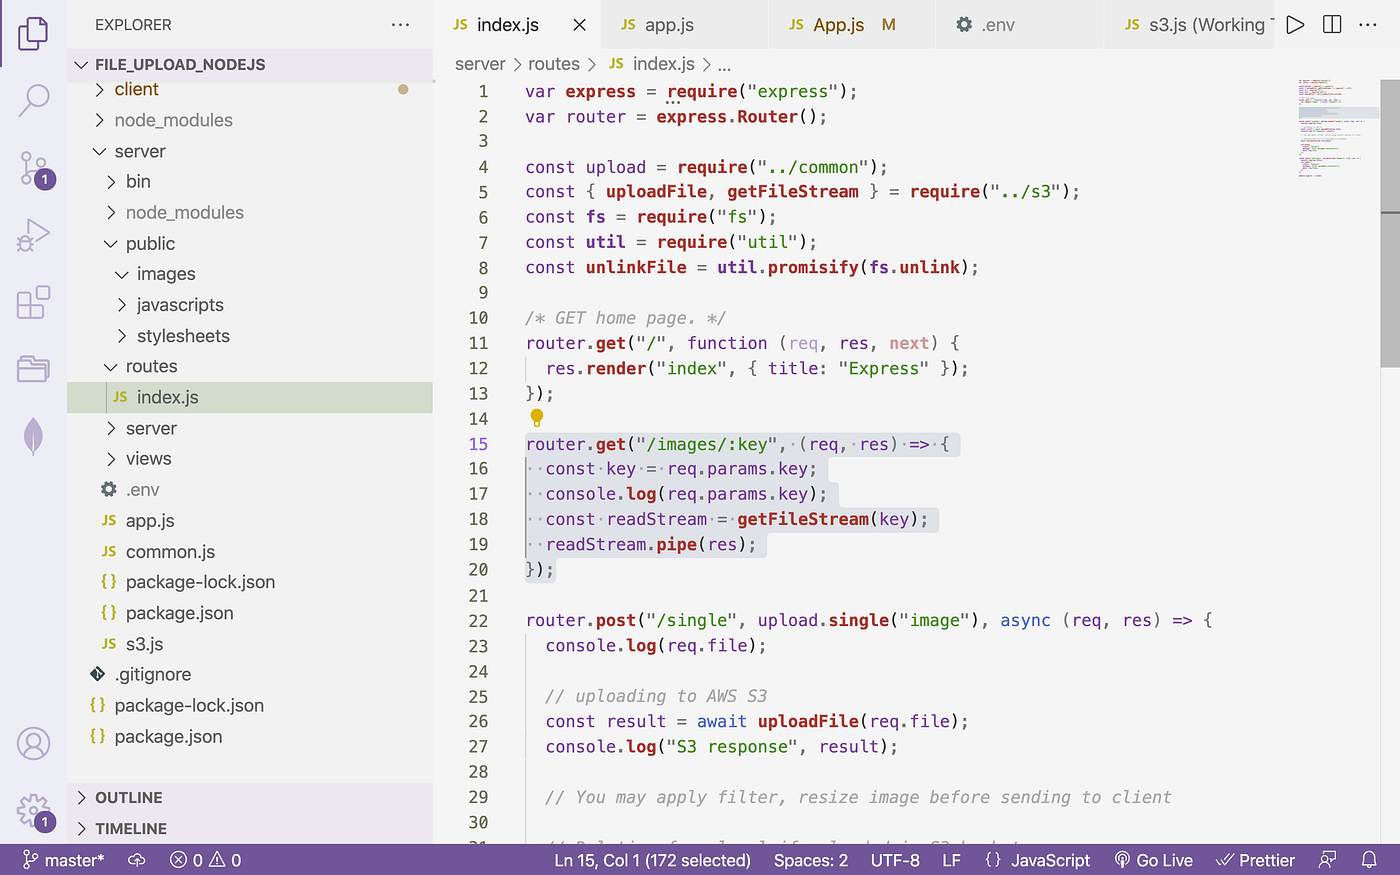
→ Employ this function routes
server/routes/index.js
          var            express            =            crave("limited");          var router =            express.Router();          const upload =            crave("../mutual");          const {            uploadFile,            getFileStream            } =            require("../s3");          const            fs            =            require("fs");          const            util            =            require("util");          const            unlinkFile            =            util.promisify(fs.unlink);
router.get("/images/:key", (req, res) => {                      const key = req.params.key;                      console.log(req.params.cardinal);                      const readStream =            getFileStream(cardinal);                      readStream.pipe(res);  // this line will make epitome readable          });          // eg <serverurl>/images/1636897090753-Coffee_book.jpeg // to be used in client

→ In the frontend, we will utilize the S3 response primal and use it in the client
Video:
https://secure.vidyard.com/organizations/1904214/players/pkYErcDdJVXuoBrcn8Tcgs?edit=true&npsRecordControl=one
Repository:
https://github.com/AmirMustafa/upload_file_nodejs
Closing Thoughts:
We accept learnt how to upload and read files from the AWS S3 bucket.
Thank you for reading till the stop 🙌 . If you enjoyed this commodity or learned something new, support me past clicking the share push button below to attain more people and/or give me a follow on Twitter to run across some other tips, articles, and things I learn about and share in that location.
More than content at plainenglish.io
Source: https://javascript.plainenglish.io/file-upload-to-amazon-s3-using-node-js-42757c6a39e9
0 Response to "Uploading Images to Aws S3 Node Js"
Post a Comment